

Oil pressure: How to diagnose a low-pressure warning
A low oil pressure warning should not be treated as a minor dashboard light. It means the engine may not be receiving the pressurized flow of oil needed to protect its moving parts, and continuing to drive can turn a repairable warning into an expensive failure. The correct response depends on whether the warning appeared while the engine was cold, at idle, during acceleration, or after the vehicle had already been driven.
Oil pressure is the pressure created when the oil pump pushes lubricant through the engine’s oil passages, filters, and bearings. It supports the parts that rotate or slide under load, including the crankshaft, connecting rods, camshaft, and valve train. When that pressure falls below the manufacturer’s specified range, a pressure sensor may switch on a warning lamp, the gauge may drop into the red zone, or the engine may begin making a warning sound.
This guide focuses on diagnosing a low oil pressure warning safely. It explains what to check first, which readings can be misleading, and how to separate common causes such as low fluid level, a failed sender, a blocked filter, or a damaged oil pump. It also explains why a warning that clears after adding oil should still prompt a careful inspection.
How the oil pressure system creates lubrication
The oil pump draws oil from the sump and sends it through the engine’s filtration and distribution system. From there, the oil reaches the main bearings, connecting rod bearings, camshaft bearings, and other components through internal passages called oil galleries. Small passages may also direct oil toward pistons, cylinder walls, timing components, and the rocker or valve train.
This system is more than a simple pump and reservoir. Oil must flow against resistance created by restricted passages and narrow bearing clearances. As engine speed rises, the pump can generate more flow, although pressure should remain within the range designed for that engine. A relief valve limits excessive pressure by diverting surplus flow back toward the sump when needed.
Pressure also changes with oil viscosity and temperature. Cold oil is generally thicker and can produce higher pressure while the engine warms. Once the oil is hot and the engine is idling, pressure is often lower because the warmed oil flows more easily. These conditions explain why the owner’s manual usually specifies the required pressure at a particular engine speed and oil temperature. A reading should not be judged against an internet range that does not match the vehicle.
| Part of the system | Job | Common signs of a problem |
|---|---|---|
| Oil reservoir and sump | Stores the lubricant and allows oil to be picked up by the pump. | Low fluid level, oil leaks, or a damaged pickup or sump. |
| Oil pump | Creates flow and develops pressure in the engine’s passages. | Low pressure across the full engine speed range, noise, or wear. |
| Filter | Traps contaminants before they reach precision engine parts. | Blocked restriction, incorrect installation, or a filter used in the wrong housing. |
| Oil galleries and passages | Route oil to bearings and other components. | Restriction, blockage, or a damaged passage. |
| Pressure sender and gauge | Measures or senses pressure and reports it to the driver or control system. | Faulty sender, wiring problem, incorrect gauge, or inaccurate reading. |
What a low oil pressure warning actually tells you
A warning light does not identify the failed part. It confirms that the vehicle’s monitoring system has detected a pressure condition it considers abnormal. Depending on the vehicle, that condition may come from a dedicated pressure sender, the engine control module, the oil level sensor, or a combination of electronic checks.
The important distinction is between a real hydraulic problem and an indication problem. A real problem exists when the engine is not receiving adequate pressurized oil. An indication problem exists when the oil system is operating correctly but the sender, wiring, gauge, or control logic is producing a false warning. Both situations deserve attention, but they lead to different repair paths.
The dashboard indication may also be related to oil level rather than measured pressure on some vehicles. A low oil level can contribute to low pressure, especially during brief low-speed operation, while a level-sensing system may report an oil-pressure fault to help prompt the driver to check the fluid. The owner’s manual should explain whether the particular warning is driven by an oil-level sensor, a pressure sensor, or a combined strategy.
Consider how the warning behaves:
- The warning appears within seconds of starting: The oil may not have reached the pump, the level may be low, or a sender or wiring fault may be present.
- The warning appears after several minutes of idling: As the oil warms and its viscosity drops, flow behavior can change, revealing a marginal circulation problem.
- The gauge falls as engine speed falls: A loose or faulty ground connection, inoperative gauge, or intermittent sender circuit may be more likely than a complete loss of pump function.
- The warning appears with engine noise: A knocking, rumbling, or grinding sound requires an immediate oil check and careful assessment before further operation.
Do not assume that a red gauge that returns to normal after revving proves the system is healthy. A temporarily higher reading can mask a weak pump, and revving the engine increases the load on an already questionable lubrication system. The safer approach is to shut the engine off, check the oil condition and level, and then determine whether the indication can be trusted.
If the same lamp also illuminates for other faults, do not treat it as a separate minor issue. A flashing engine warning can indicate a more serious stop-and-check condition; engine light flashing: why you should pay attention explains how to distinguish a steady warning from a flashing one and when the vehicle should not be driven.
What to do immediately when the warning appears
Begin with the safest practical action: reduce engine speed, move the vehicle to a safe location, and shut the engine off. If the oil-pressure gauge enters the red zone, do not continue at highway speed to reach a shop. If the vehicle is at a traffic light, avoid repeatedly accelerating or revving the engine to test the gauge.
Allow the engine to cool for a short period, open the hood, and locate the oil dipstick and filler cap according to the owner’s manual. The dipstick location and measuring procedure vary by model. Some cars require the vehicle to sit on level ground; others specify a different sequence or checking interval. Follow the instructions for the exact vehicle rather than assuming every engine uses the same method.
Check the oil level and inspect what the dipstick shows:
- Confirm that the car is parked on level ground and that the engine has been off for the manufacturer’s recommended settling time.
- Remove the dipstick, wipe it clean, reinstall it fully, then withdraw it again for a proper reading.
- Compare the oil level with the markings on the dipstick and the range specified in the owner’s manual.
- Inspect the oil for a metallic odor, milky appearance, heavy grit, water contamination, or a texture that does not suit the vehicle’s recommended oil.
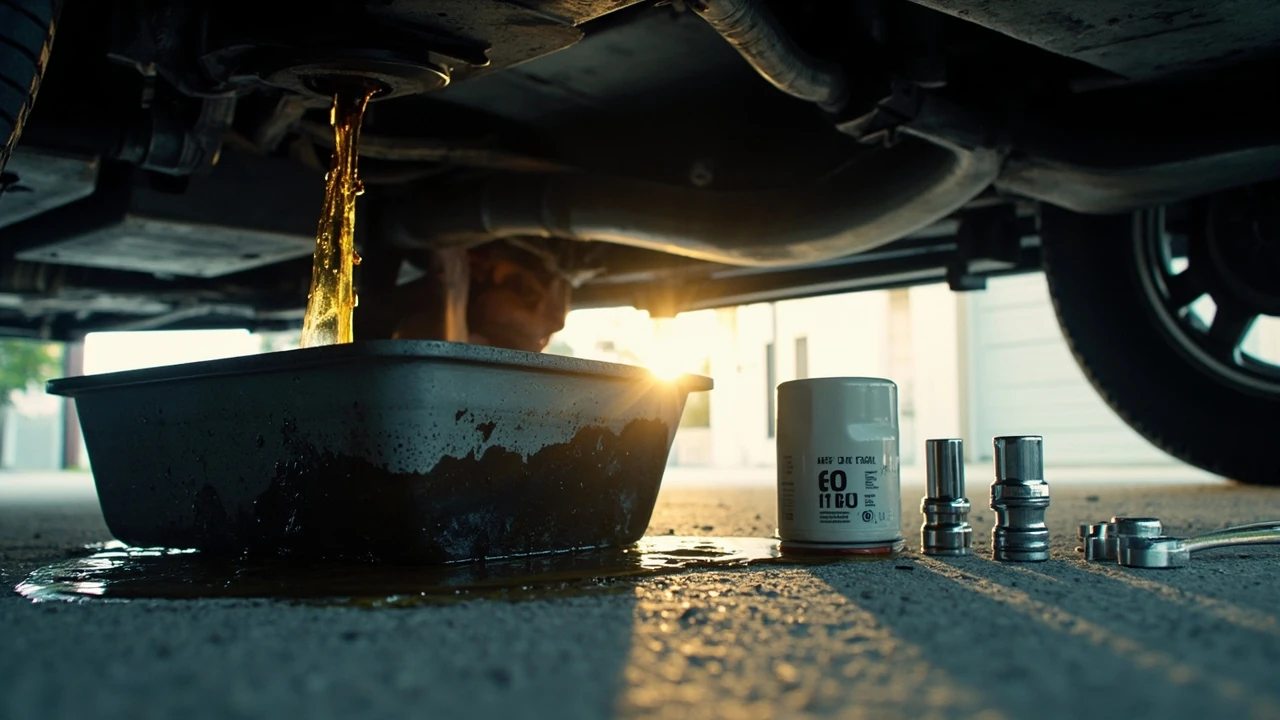
- If the level is low, identify the reason before adding oil. Look beneath the car and around the oil pan, filter housing, and valve covers for an obvious leak.
Add only the oil type and quantity specified for the engine. Pouring in a large amount of the wrong viscosity can itself create problems, and overfilling can cause foaming, aeration, leakage, or an inaccurate level reading. If the dipstick shows oil but the warning remains, do not assume the fluid level is acceptable. Some engines consume oil, and a reading below the normal range still warrants investigation.
A lack of engine noise during a brief restart does not clear the vehicle. If the oil level is correct and the warning returns, the next step is diagnosis rather than another drive. Continuing to operate an engine that is truly losing oil pressure can damage bearings and other components quickly.
If the engine is difficult to start and makes a rapid clicking sound, stop repeated cranking. That symptom can accompany inadequate lubrication, though it has other causes as well. The guide to a clicking sound when starting a car explains the difference between starter noise, accessory noise, and other causes.
How to diagnose the cause step by step
Once the immediate oil level has been checked, the diagnostic process should move from simple, accessible causes toward more involved mechanical tests. A technician may begin with a visual inspection and oil analysis before removing covers or pressure-testing the lubrication system. The order prevents an expensive pump replacement when the actual fault is a loose electrical connector or a blocked filter.
1. Confirm the level and condition
Verify the level correctly, then examine the oil’s color, smell, and texture. Dark oil alone does not prove it is bad, because some oils darken through normal use and oxidation. Clear signs of the wrong fluid, contamination, or severe degradation are more useful. If the oil looks like water, contains coolant, or has a fuel-like smell, the cause and repair path differ from a basic low-level condition.
2. Check for external leaks
The operating relationship between the oil, the pump, and the engine is explained further in the Wikipedia overview of engine lubrication pressure, which provides useful background for this point. That background is useful because a low reading does not always point directly to the pump. The same warning can result from inadequate fluid, a filter that restricts flow, leaks, worn bearing clearances, or an electrical fault that does not involve the lubrication hardware at all.
Inspect the visible area around the oil pan, filter, oil pan gasket, valve cover gasket, front cover, and any accessory brackets that sit near the engine. Fresh oil on a lower engine component can identify the likely leak source. A leak may not be visible from above, so a clean engine bay does not rule out leakage at the sump or lower seals.
3. Evaluate the warning circuit
If the oil level and visible condition are normal, the sender, wiring, connectors, and gauge become important. A broken wire near a moving engine component can create an intermittent reading. A failed sender can report no pressure even when the pump is producing some flow. Electrical diagnosis should include checking the vehicle’s stored information and live data when the manufacturer’s diagnostic procedure calls for it.
4. Check filter installation and flow
A clogged filter can restrict the pump’s outlet and affect pressure. Incorrect installation is also possible, particularly when a cartridge filter is fitted in a housing designed for a different filter type or when the housing is assembled incorrectly. During service, verify the filter and housing against the vehicle’s specifications rather than judging by appearance alone.
5. Measure actual pump output
A mechanical or electronic pressure test compares actual engine oil pressure with the manufacturer’s range at the specified operating conditions. Testing pressure at the wrong point, using the wrong fitting, or comparing a cold reading with a hot-idle specification can produce a false conclusion. A good test evaluates both pressure and whether the reading responds as engine speed changes.
| Possible cause | Typical pattern | Useful next check |
|---|---|---|
| Low or incorrect oil level | Warning appears at start-up or during low-speed operation; oil may be visibly low. | Recheck the dipstick and correct the level using the specified oil. |
| External leak | Fresh oil appears below the engine or around a gasket or seal. | Inspect the oil pan, filter area, covers, and seals. |
| Blocked filter or wrong filter | Pressure is low while the pump may still run; installation history may support the cause. | Verify the filter part, installation, and housing condition. |
| Failed sender, wiring, or gauge | Warning does not match actual pump behavior or varies with electrical conditions. | Compare the indication with a measured pressure test and inspect the circuit. |
| Worn pump or relief valve | Measured pressure remains low or cannot hold the expected range. | Perform a controlled pressure and flow test. |
| Damaged bearings or internal passages | Low pressure may occur in specific operating conditions and can accompany engine noise. | Use the manufacturer’s diagnostic sequence to locate the loss of flow. |
How to interpret gauge readings and test results
A pressure gauge becomes meaningful only when its reading can be compared with the correct specification. Most service information states pressure at a particular engine speed, often at idle, and may provide a separate range for hot oil. A pressure that appears acceptable to one person may be inadequate for another engine because pump capacity, bearing clearance, oil viscosity, and system design differ.
Temperature matters. Cold oil is thicker, so pressure can rise as the engine warms and the oil thins. The oil also needs time to reach every passage. A reading taken immediately after starting may not represent stabilized circulation, which is why a hot-idle test can differ significantly from a cold reading.
Also distinguish pressure from flow. The pump creates flow through the engine, while restrictions and bearing passages create the pressure that can be measured. A gauge connected at the wrong location may show a different value from the sender or the point specified by the manufacturer. Test equipment and fittings must be appropriate for the engine and installed so they do not create a leak or alter the result.
Review the result as a pattern rather than a single number:
- Does pressure rise from idle to a higher engine speed?
- Does the hot reading match the manufacturer’s specified range?
- Is the oil flow sufficient at the test point?
- Do the pressure sender, dashboard gauge, and scan data agree?
- Did the test expose a restriction, leak, or abnormal noise?
If the mechanical test shows adequate pressure but the warning lamp remains on, the fault likely lies in the monitoring circuit. If the test shows low pressure while the sender claims the engine is fine, the oil circulation problem must be diagnosed. Neither conclusion should be reached from the dashboard alone.
After any repair, the system should be refilled with the specified oil, all caps and seals should be secured, and the level should be checked again using the vehicle’s procedure. The warning should be cleared only after the underlying cause has been addressed. A code reader may erase stored fault information, but erasing a code does not remove the condition that created it.
Why the symptoms differ across engines and vehicles
Two cars can display the same oil pressure warning for different reasons. Older vehicles may use a mechanical gauge and a direct mechanical sender, while newer vehicles may combine an electronic sender, body control module, and engine controller. Some vehicles provide an analog gauge, some display pressure as a digital value, and others warn the driver only after a system fault is confirmed.
The design of the lubrication system also changes how faults appear. Some oil galleries feed the main bearings first, while others use multiple branches that can make the location of a blockage less obvious. A worn bearing creates more clearance and can reduce hydraulic support, but it may also be one symptom of broader wear or inadequate lubrication. Diagnosis should not assume that the first failed component discovered is the original cause.
Driving style and operating conditions affect when the problem becomes visible. Repeated short trips can keep the engine from reaching full operating temperature. Stop-and-go traffic creates more low-speed operation than steady highway driving. Heavy towing, sustained high load, high ambient temperatures, and use of the wrong oil viscosity can expose a marginal system. A fault that never appears during a short trip may still be real.
Vehicle history provides useful context but does not determine the answer by itself. A recent oil change with the wrong filter or incorrect oil quantity deserves early attention. A vehicle with prior warning-light, leak, or lubrication-system repairs may have a known history. Conversely, a well-maintained vehicle can develop a failed sender, a damaged wiring route, or a sudden internal failure.
Do not use a generic minimum pressure from an unrelated engine as a pass-or-fail test. Compare the reading with the owner’s manual or service information for the exact engine, and use the vehicle’s warning behavior only as supporting evidence. The gauge, warning lamp, and scan tool are parts of one information system, but no one indicator works alone.
How to prevent another low-pressure episode
Prevention starts with the correct fluid and a sound maintenance schedule. Use the oil viscosity and specification stated for the engine, and check the level at the interval recommended by the manufacturer. Conditions such as extended idling, repeated short trips, heavy towing, or severe winter operation may justify checking more often than the normal interval.
Pay attention to changes that occur between services:
- The engine consumes more oil than it did previously or the level repeatedly drops.
- Fresh oil appears beneath the vehicle or on engine components.
- The warning appears when the engine is hot or the oil has had time to circulate.
- The gauge behaves inconsistently with the vehicle’s speed.
- The engine develops a knocking, rumbling, or grinding sound that changes with load.
Keep service records with the oil specification, mileage, filter part, and any work performed around the oil pan or engine covers. If a component is replaced, verify that the replacement seals, gaskets, plugs, and fittings are correct. A repeated leak can result from incorrect installation even when the new part itself is sound.
After adding oil, do not treat the change as the final repair if the warning was accompanied by noise, an extremely low level, or a pressure reading below specification. A top-up may restore enough fluid for a controlled return to service, but it does not explain the loss. If the vehicle repeatedly needs oil between scheduled services, a leak or consumption problem may be present.
Use the car as it was designed. Avoid prolonged high engine speed when a warning is present, and do not assume that revving the engine will “clear” the lamp. If the pressure is genuinely low, higher RPM can increase the demand on bearings that are not being adequately supported. A careful check is more useful than repeated starts, short test drives, or extended idling.
Frequently asked questions
Can I drive my car with the oil pressure light on?
Do not continue driving if the oil pressure light remains on or the gauge is in the red zone. Stop the engine as soon as it is safe to do so and check the oil level. If the warning clears only after a correct oil top-up, the car may be drivable to a repair shop, but only after confirming adequate fluid and arranging careful transport. Do not drive the vehicle if the engine is making knocking or grinding noises, the oil level cannot be maintained, or the warning returns immediately.
Why does oil pressure rise after I start the engine?
Cold oil is more viscous, and thicker oil can produce a higher reading before the engine warms. As the oil temperature rises and viscosity falls, pressure may decrease even though circulation remains adequate. This is why the manufacturer normally specifies the required reading at a defined speed and oil temperature. An abnormally low cold reading can still indicate a problem if it fails to reach the specified range.
Is low oil pressure the same as low oil level?
No. Low oil level can cause or contribute to low oil pressure, but they are different conditions. A level sensor may also trigger an oil-related warning on some vehicles. Conversely, a vehicle can have a correct oil level and still develop a restriction, leak, pump problem, bearing issue, or faulty sender. Both the fluid level and the pressure indication need to be evaluated.
Can a bad oil pressure sensor cause a warning light?
Yes. A failed sender, damaged wiring, poor connector, or gauge fault can create a warning even when the lubrication system is supplying adequate pressure. A pressure test can help distinguish an indication fault from an actual oil circulation problem. The test should follow the manufacturer’s procedure and use the correct testing location and oil temperature.
What happens if the oil pressure is too low?
Low pressure reduces the oil film between rotating surfaces. Instead of separating cleanly, metal surfaces can touch, causing heat, wear, and damage. The consequences can progress from bearing scoring to a seized engine. The exact speed of damage depends on the engine, load, oil level, and how far below specification the pressure remains, which is why continued operation is not appropriate.
Does a clogged oil filter cause low oil pressure?
Yes. A blocked filter or incorrect filter can restrict oil flow and affect the pressure the pump develops. The filter should match the vehicle and be installed according to the manufacturer’s instructions. Incorrect filter type, a damaged housing, a missed sealing element, or debris around the housing can also cause oil-flow or leakage problems.
Should I add oil before calling a mechanic?
Check the level first. If it is below the specified range, adding the correct oil may be necessary before moving the vehicle. Do not add a large quantity of the wrong fluid, and do not overfill. If the level is normal, the warning returns, or the car is consuming oil, schedule diagnosis rather than repeatedly topping it up. Bring the service history and the results of your level check to the repair appointment.
Why does the gauge show pressure but the warning light stays on?
The dashboard light and gauge may use different sensing or control paths. A sender, wiring fault, control module, or incompatible signal can keep the warning active even while another indication looks normal. A controlled pressure test with the correct engine operating conditions can show whether real pressure is present. This is another reason to rely on a complete diagnosis rather than choosing whichever dashboard message looks better.
What oil level should I maintain?
Use the range marked on the dipstick and the procedure in the owner’s manual for the exact vehicle. Keep the engine on level ground and observe the specified waiting time before reading the dipstick. Add oil gradually and recheck. If the level falls repeatedly, investigate leaks, consumption, or incorrect fluid before assuming the car only needs routine top-ups.

Leave a Reply