
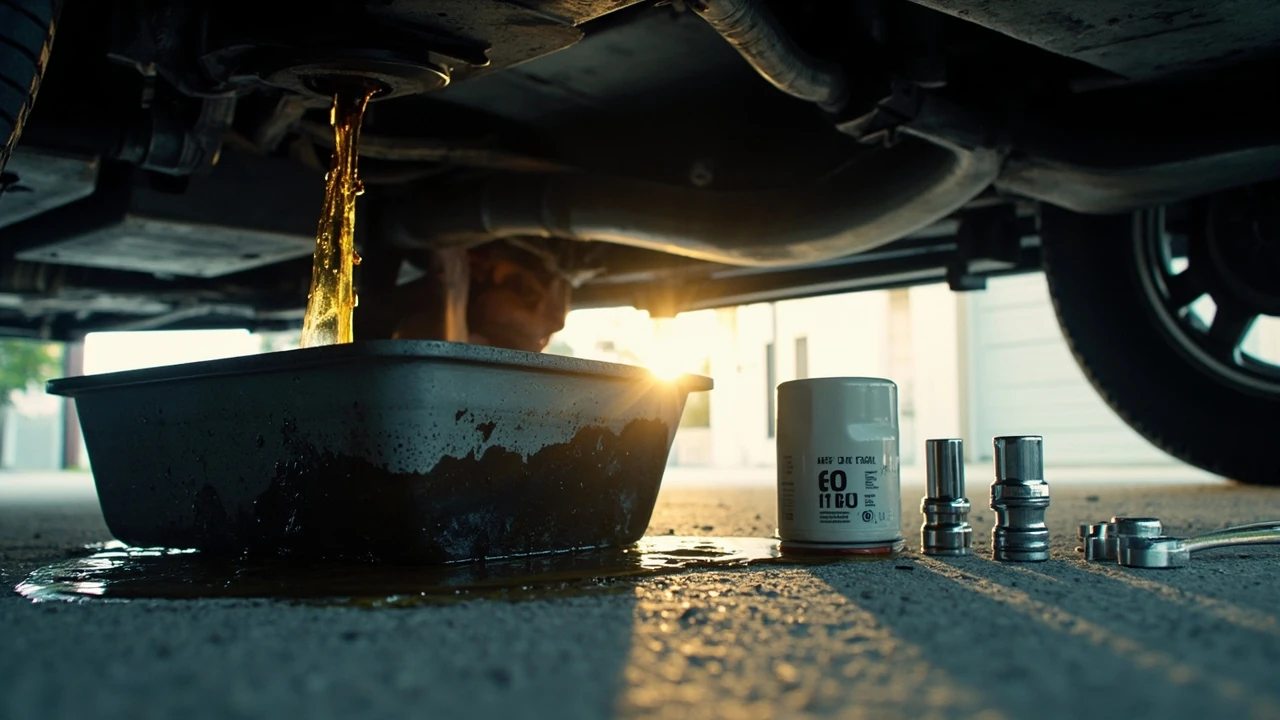
Car oil change: what the owner’s manual actually requires
A car oil change is not simply a matter of choosing a date on the calendar. The right interval depends on the engine, the oil specification, how the vehicle is driven, and the maintenance schedule approved by its manufacturer. The owner’s manual is the starting point because it ties the oil, filter, capacity, and service interval to the exact vehicle. A quick service record can then confirm when the work was last completed and whether the mileage interval came first.
This guide explains how to determine the correct interval, select the required oil, replace the filter, inspect the engine, and check the finished job. It also covers the warning signs that justify an earlier inspection and the differences between doing the work yourself and having a qualified repair shop handle it.
Most vehicles do not need the strongest, thickest oil available. They need an oil that meets the viscosity and performance standards listed for the engine. Likewise, a low-mileage vehicle is not automatically exempt from oil changes. Short trips, extended idling, repeated stop-and-go traffic, heavy loads, towing, and operation in extreme temperatures can make scheduled maintenance more demanding even when the annual mileage looks low.
| Information to check | Where to find it | Why it matters |
|---|---|---|
| Oil type and viscosity | Owner’s manual, oil filler cap, or approved specification label | Ensures the oil meets the engine manufacturer’s requirements |
| Oil-change interval | Maintenance schedule in the owner’s manual | Establishes normal and, where listed, severe-service intervals |
| Engine oil capacity | Owner’s manual and engine-bay data label | Helps prevent an underfilled or overfilled engine |
| Filter specification | Parts catalog or owner’s manual | Confirms the correct part for the engine |
| Last service | Owner’s maintenance log, receipt, or repair history | Helps calculate when the next service is due |
How often should you schedule a car oil change?
Use the oil-change interval in the vehicle’s maintenance schedule, not a generic rule for its age or mileage. The schedule may distinguish between normal service and severe service. It may also specify different intervals for gasoline and hybrid powertrains, engine configurations, or models sold in different markets. Because the requirements can vary even within one model line, the manual for the vehicle in question is the document that counts.
Start by calculating both measures that the schedule uses:
- Time: Determine how much time has passed since the last oil change. An elapsed-time limit can matter even when the vehicle has not reached a particular mileage.
- Distance: Add the current odometer reading to the mileage at the last completed oil change. Compare that total with the applicable scheduled interval.
The earlier limit should guide the next appointment. If a vehicle is due at 7,500 miles or 12 months, changing the oil around the 7,500-mile mark would leave it overdue for the time-based limit if the service waits until the following year. Exact intervals and severe-service definitions must come from the manual rather than from this example.
A schedule for “severe service” does not mean the vehicle is damaged or driving badly. Automakers use the term for operating patterns that place greater demand on fluids and components. The following conditions commonly justify reviewing the severe-service portion of the schedule:
- Repeated short trips that do not allow the engine to reach a full operating temperature
- Extended idling, stop-and-go traffic, or repeated crawling in congested areas
- Heavy passenger or cargo loads
- Operation on a vehicle used for towing or hauling
- Driving on roads covered with salt, sand, dust, or other abrasive material
- Very cold or very hot ambient temperatures, especially with repeated long idle periods
Do not automatically shorten every interval because of one hard week of weather. Use the schedule for the pattern of use, and keep a record of why a change was made early. Severe driving that is occasional may still be reasonable to address at the next normal service. Constant short commutes over many months are more likely to justify the shorter schedule.
The oil-life monitor in the instrument panel can provide another reminder, but it is not a replacement for the written schedule on every vehicle. Follow the owner’s manual for what the message means, whether it considers filter life, and how to reset it after service. A warning should not be ignored simply because the last recorded oil change appears recent. A reset service history can be wrong, and some warning behaviors are poor indicators of remaining useful life.
What oil and filter does your vehicle need?
The engine manufacturer’s oil specification matters more than the oil brand or the marketing language on the container. A bottle may look appropriate while using the wrong viscosity or failing a required performance standard. The specification can appear in the owner’s manual, on an under-hood label, on the oil filler cap, or in a vehicle information screen. Some manufacturers permit more than one acceptable option, but each listed option has conditions.
Two elements are commonly referenced together:
- Viscosity describes how the oil flows at specified temperatures. The required grade, such as a multi-weight SAE viscosity, belongs in the manufacturer’s specification.
- Performance standards identify the tested qualities required for the engine. The listed specification may refer to an industry standard and an approval test, depending on the vehicle and market.
The correct choice is the combination that satisfies the full specification. An oil that matches the viscosity but lacks a required approval is not automatically acceptable. Likewise, an oil with an impressive performance claim is not a better match if its viscosity falls outside the stated range.
| Label term | What it tells you | What it does not tell you |
|---|---|---|
| SAE viscosity | The oil’s flow behavior at stated temperatures | That the oil meets every engine-specific requirement |
| Industry performance category | The standards the oil was tested to meet | That it is approved for every vehicle sold in every market |
| Manufacturer approval | Compatibility with a specified vehicle or engine application | Permission to ignore the required viscosity or capacity |
| Low-mileage formulation | May contain additives intended for limited use and different aging | That it is the preferred choice for every newer engine |
| Synthetic blend or full synthetic | Describes how the base oil is formulated | That one label is better for every operating condition |
Do not assume that full synthetic is required or that conventional oil is inherently unsuitable. The engine design, oil specification, service history, and manufacturer guidance determine the acceptable choice. For many engines, the factory-approved options include several formulations designed for different climates and duty cycles.
Select the filter by part number whenever possible. A cartridge filter must match the housing and sealing dimensions. A spin-on filter must have the correct thread, gasket, and overall dimensions. Replacing a filter with a physically similar unit can cause installation problems, an incorrect seal, or a restriction that does not match the original design.
When the engine has an integrated filter cartridge or a filter element accessible through a service cover, identify that configuration before ordering parts. Some replacement kits include a filter housing seal, drain plug washer, or other service items. The correct parts and quantities should be identified before the work begins.
For each oil container, record the viscosity and specification before opening it. Keep the container closed until the oil is needed, protect the filler opening from dirt, and use a clean funnel if the owner’s manual and local practice permit it. Never pour automotive engine oil into the coolant reservoir. Color is not a reliable indicator of oil grade, and an engine should be filled only with the product identified for that powertrain.
What to check before draining the old oil
A car oil change becomes much more predictable when the vehicle is inspected before anything is removed. Start with the owner’s manual for lifting points, access to the drain plug, recommended conditions, and any special procedures. Do not rely on a generic undercarriage photograph. Some vehicles use a drain valve, a service port, a front engine cover, or a procedure that requires the vehicle to be level. Hybrid and electric vehicles may also have high-voltage components or specific procedures that require additional precautions.
Before starting, check the following:
- Confirm the oil specification, capacity, filter part, and applicable service interval.
- Record the current mileage and the date of the previous oil change.
- Inspect under the vehicle for existing leaks, damaged hoses, loose components, or signs of a collision repair.
- Check the oil level before draining to identify a sudden increase, such as fuel dilution, or a low level that may indicate leakage or consumption.
- Confirm that the battery, lighting, and work area are safe, especially if the vehicle will be raised.
- Locate the approved way to drain and dispose of used engine oil and the filter.
Check the tire condition and secure the vehicle according to the manual. If the car will be supported by a jack, use rated jack stands at manufacturer-specified locations. A jack alone is not a stable support. Wheel chocks do not replace the stands, and working beneath a vehicle supported only by a jack creates a serious crush hazard.
Allow the engine to cool before removing the drain plug. The old oil may be hot enough to burn skin, and a hot plug can loosen unexpectedly. Place a drain pan with enough capacity for the specified quantity before opening the sump. Some vehicles retain residual oil above the drain plug, so leave room for more than the nominal fill capacity. Move the pan as the vehicle settles if the hose or plug drains at an angle.
If the plug will not turn by hand, do not force it. The threads may be damaged, seized, or incorrectly tightened. Before applying more force, inspect the plug and threads for cross-threading, debris, and deformation. This is also a good moment to check whether the drain plug uses a crush washer or a sealing washer. Replacement sealing hardware may be needed, depending on the manufacturer’s instructions.
How to complete the oil change step by step
A basic oil change follows the same general sequence in most vehicles, although access and product requirements differ. The steps below are a maintenance framework rather than a substitute for the service instructions for a particular model.
- Prepare the vehicle. Place it on a level surface, use the specified support points, and allow the engine to cool. Remove the filler cap if the manufacturer instructs you to do so before draining.
- Position the drain pan. Fit the catch container under the drain plug or designated drain opening. Protect the underbody and nearby components from oil and from the tools used to remove the plug.
- Remove the drain plug. Clean the plug if it will be reused and inspect it for thread damage. Replace the sealing washer if required. Do not replace a damaged plug with an unverified substitute.
- Let the old oil drain. Allow enough time for the oil to flow out, but do not leave the drain plug out longer than necessary. Inspect the drained oil and filter for unusual debris, excessive metallic material, or water. A sudden change in appearance can justify further diagnosis rather than simply installing a new filter.
- Inspect the sealing area. Clean the drain-plug surface and replace the plug by hand before tightening. Follow the specified tightening procedure. Overtightening can strip the threads or distort the sealing surface.
- Replace the filter. Prime the new cartridge filter with clean engine oil when the manufacturer calls for it. Lightly oil the spin-on filter gasket, if appropriate. Install the correct filter until the gasket contacts the mounting surface, then tighten by the specified amount or to the manufacturer’s instruction. Do not use sealant on the filter gasket unless the manufacturer expressly permits it.
- Add the correct oil. Pour in the specified oil and viscosity. Use the published capacity, but also check the level because the exact amount required can vary with sump design, engine configuration, and residual oil in the system. Do not use the filler dipstick as the only source of the capacity figure.
- Check the level. With the vehicle positioned according to the manual, check the dipstick or oil-level system. Add oil as needed, then recheck. The correct level is between the marked range, not above the maximum mark.
- Prime the system. Start the engine briefly or follow the manufacturer’s oil-system priming procedure. Watch the oil-pressure indication and listen for unusual noises. Check beneath the engine for leaks.
- Recheck after shutdown. Allow the oil to drain back to the sump, then check the level again and inspect the drain plug, filter housing, and surrounding area.
Use new drain-plug washers and a fresh filter instead of reinstalling an old filter. Replace the filter even when the interval is short if the filter is the cartridge type and the vehicle configuration requires routine access to it. For spin-on filters, the exact replacement frequency should follow the manufacturer’s maintenance guidance.
The used oil and filter contain contaminants from the engine and the environment. Do not pour them into a storm drain, onto the ground, or into household trash. Local regulations determine the proper collection and recycling route. An auto parts store or service facility may accept used oil and filters, subject to its stated conditions.
Alternative service systems are being developed to reduce the time and mess involved in conventional draining and refilling. A For additional context, BBC report on a cartridge-style car oil change system describes Castrol’s unveiling of a method that resembles the printer-cartridge approach. Such systems may offer a different way to replenish engine oil, but they still need to meet the engine’s approved oil specification and the manufacturer’s maintenance requirements.
What to inspect after the service is finished?
A fresh service is not finished when the oil goes into the engine. Check the work while you still have the old oil, the removed filter, and the service notes available. This is the best time to identify an incorrect part, an incomplete installation, or a leak that could become harder to diagnose later.
| Check | What to look for | Action if something is wrong |
|---|---|---|
| Oil level | A level within the manufacturer’s marked range after the final settling period | Add or correct the level according to the manual; investigate an unexpected high level |
| Drain plug | Clean threads, secure seating, no seepage | Do not tighten blindly; check the sealing surface and thread condition |
| Filter | Correct part, proper seating, no oil around the housing | Verify the part number and reinstall or replace it as required |
| Oil pressure indication | Normal indication during the brief engine run | Stop the engine if the warning remains and seek diagnosis |
| Engine bay | No fresh oil on the cap, dipstick tube, or surrounding components | Clean the area and correct the source before driving |
| Service record | Correct mileage, date, oil specification, capacity, and filter | Correct the record so the next interval can be calculated accurately |
Reset the oil-life monitor only when the manufacturer’s instructions call for it. Some vehicles require the oil-change indicator to be reset for the replacement to be recognized electronically; others do not use a resettable monitor. If the warning message remains after a correct service, consult the manual rather than resetting it repeatedly and ignoring the underlying message.
Keep the invoice or shop record. It should identify the date, mileage, oil used, filter installed, and whether any additional inspection was recommended. A record is especially useful when the manufacturer uses both time and distance. It also helps a later technician distinguish new seepage from an older leak.
For the first drive, remain alert to an oil-pressure warning, a low-oil message, a burning smell, or fresh fluid under the car. Stop safely and inspect if any of these occur. A brief smell can occur while small amounts of oil drain onto a hot exhaust component, but a strong or persistent odor is not something to treat as normal.
Which warning signs call for an earlier oil check?
Oil condition is one part of engine health, but some warning signs may indicate that the oil is low, contaminated, or no longer doing its job. A scheduled oil change will not correct every engine problem, so the symptoms matter.
- Low-oil warning: Check the level and inspect for leakage as soon as it is safe to do so. Add the correct oil if needed, but determine why the level fell.
- Dark oil with a fuel odor: A gasoline smell in the oil can be associated with fuel dilution, particularly after repeated short trips. The condition and its cause need evaluation.
- Milky residue: Oil that looks milky, foamy, or unusually emulsified may indicate coolant entering the engine, though appearance alone does not prove the cause.
- Knocking or unusual engine noise: Low or degraded oil should be checked, but noise can also come from other mechanical problems.
- Oil-pressure warning: Treat this as a reason to stop the engine safely and investigate rather than treating it as another routine maintenance appointment.
- Excessive consumption: A rising oil level between services can indicate fuel dilution, while a need to add substantial oil may point to leakage or consumption that needs diagnosis.
A flashing check-engine light is different from a steady warning. If the light flashes, the vehicle may be experiencing a serious running fault, and continuing to drive could risk additional damage. The cause should be diagnosed before the oil service is treated as the solution. Similarly, a clicking sound at startup can lead to questions about battery condition or starter operation that are unrelated to the oil.
Do not judge used oil only by its color. Color changes naturally with age and use. A dark filter, a metallic particle in the drain pan, or a sudden increase in debris can be more informative, but even those observations do not replace a mechanical inspection. If the previous service was done by a shop, ask what it found and whether any fluid analysis or inspection was included.
Should you do the oil change yourself or use a shop?
The practical choice depends on your vehicle, tools, experience, physical ability, and local disposal options. A do-it-yourself oil change can be straightforward on many vehicles, but access, lifting equipment, special fasteners, and fluid requirements can make it less convenient than expected.
| Consideration | Doing it yourself | Using a repair shop |
|---|---|---|
| Cost | Oil, filter, basic tools, and disposal costs | Labor, parts, disposal, and applicable taxes or shop fees |
| Convenience | Requires time, suitable access, storage, and safe lifting equipment | May require scheduling and transportation arrangements |
| Correct specification | Owner must select the oil, capacity, filter, and interval accurately | Shop should use the documented vehicle requirements |
| Inspection | Owner may notice leaks or irregular noise during the job | Shop may have equipment or procedures for additional checks |
| Records | Owner must record mileage, date, product details, and filter part | Invoice generally provides a service history, though the owner should review it |
Choose a shop that identifies the vehicle, follows the manufacturer’s schedule, states the oil specification and capacity, uses the correct filter, and provides a record of the mileage and date. Ask whether the price includes the filter, disposal, and a multi-point inspection. If the shop recommends additional fluid services, request an explanation tied to the vehicle’s condition rather than a generic package name.
Do-it-yourself work makes more sense when the owner has safe access to the required tools and can confirm the service specification. A professional service is often more practical for a vehicle with a tight engine bay, a drain plug that is difficult to reach, a complex filter arrangement, lifting requirements, or signs of a leak that may need diagnosis. The right choice is not about doing the job alone; it is about completing it correctly and safely.
Frequently asked questions
How do I know when my car needs an oil change?
Compare the current date and mileage with the owner’s manual and the record of the last service. Use the normal or severe-service schedule that applies to how the vehicle is driven. If either the time or distance limit has been reached, schedule the oil change. An oil-life warning is an additional reminder, but it should not replace the documented interval on vehicles where that system is not designed as a precise mileage calculation.
How many miles can I drive between oil changes?
The interval depends on the specific engine, model year, oil specification, and driving pattern. Some manufacturers schedule changes by time, some by mileage, and some by both. Follow the interval in your owner’s manual rather than a universal mileage figure. Severe driving may require the shorter schedule. Record the date and mileage at each service so the next comparison is accurate.
Does a car oil change need a new filter?
Use a new filter as part of a conventional oil change unless the manufacturer specifies a filter replacement interval that allows the existing filter to remain. A spin-on filter is removed and replaced when the service is performed. Cartridge filters are replaced at the interval stated in the maintenance guidance, which may be tied to oil-change frequency. Confirm the correct part number because similar-looking filters may differ in gasket, thread, dimensions, or bypass design.
Can I change the oil without the engine cooling down?
Hot oil can burn skin, and a hot drain plug may be difficult to remove safely. Let the engine cool for the period specified by the owner’s manual. The exact cooling time depends on the vehicle and operating conditions. Use a suitable drain pan and protect nearby components. Do not pour water or a coolant mixture into the engine to speed cooling; that can create additional problems and may contaminate the oil system.
What happens if I put too much oil in the engine?
An overfilled engine can aerate the oil, reduce lubrication effectiveness, create foaming, and trigger an oil-level or pressure-related warning. Check the level using the manufacturer’s procedure and correct it promptly. The engine may need to warm and settle so oil returns from the filter and engine passages. If the level rises again, investigate why, because fuel dilution or another fault may be adding fluid to the oil.
What happens if I put too little oil in the engine?
Low oil can increase friction and heat, and continued operation can damage components that depend on lubrication. Check the level as soon as it is safe, add the correct oil gradually, and recheck. Inspect for leaks and determine why the level was low. If the oil-pressure warning is active, do not continue driving until the level is corrected and the warning condition has been addressed.
Can I switch between synthetic and conventional oil?
Possibly, but the replacement should meet the full oil specification and viscosity required by the manufacturer. Synthetic and conventional oils are not automatically interchangeable if the approved specification is not met. A blend may also be acceptable when it appears in the owner’s manual. Avoid switching specifications without a reason, especially if the engine has an existing leak or a history of oil consumption, because a different viscosity or formulation can change the visible symptoms.
Does the color of used engine oil show whether it needs changing?
Not reliably. Oil naturally darkens as it ages and accumulates contaminants, and color can vary with the approved formulation. Use the service schedule, oil-life information where applicable, and the vehicle’s service history. During a change, the old filter and drain pan can reveal unusual debris or liquid, but those observations should be interpreted alongside the vehicle’s symptoms and maintenance records.
Should the engine oil-change light be reset after service?
Follow the owner’s manual. Some vehicles require the oil-life monitor to be reset for a completed service, while others may not use a resettable indicator. A correct reset supports accurate maintenance tracking, but it does not correct a mechanical problem. If the warning remains, has an unusual message, or appears again earlier than expected, have the vehicle inspected rather than resetting the message repeatedly.




Leave a Reply